Welcome to our step-by-step tutorial on mastering Windows 11. This guide will help you organize your desktop, customize settings, and utilize powerful shortcuts for a smoother and more efficient computing experience.
1. Arrange Desktop Icons and Change Icon Size
Organizing your desktop icons can help keep your workspace neat and efficient. Here’s how you can do it:
- Right-click on the desktop.
- Hover over “View” and choose your preferred icon arrangement, such as “Auto arrange icons” or “Align icons to grid.”
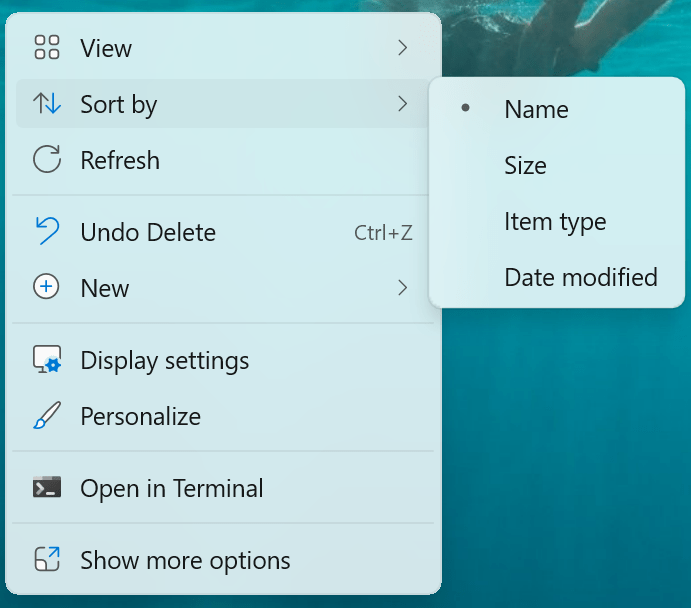
Another way to arrange icons is by using the “Sort by” option:
- Right-click on the desktop.
- Hover over “Sort by” and select an option like “Name,” “Size,” “Item type,” or “Date modified” to automatically sort your icons based on these criteria.
Additionally, you can change the size of your desktop icons for better visibility or more screen space:
- Right-click on the desktop.
- Hover over “View.”
- Select “Large icons,” “Medium icons,” or “Small icons” to adjust the size of the icons.
2. Enable Autohide on the Taskbar
Enabling the autohide feature on the taskbar provides more screen space and a cleaner desktop look. Here’s how you can enable this feature:
- Right-click on the taskbar and select “Taskbar settings.”
- In the Taskbar settings window, click on “Taskbar behaviors.”
- Check the box for “Automatically hide the taskbar.”
3. Enable the Desktop Shortcut Button
The desktop shortcut button, a feature introduced in Windows Vista, allows quick access to the desktop by minimizing all open windows. Here’s how to enable it in Windows 11:
- Right-click on the taskbar and select “Taskbar settings.”
- In the Taskbar settings window, click on “Taskbar behaviors.”
- Scroll down to the “Taskbar behaviors” section.
- Check the box for “Select the far corner of the taskbar to show the desktop.”
4. Winkey + D to Show Desktop
Using the “Winkey + D” shortcut instantly shows the desktop, minimizing all open windows. Press the Windows key and the letter D simultaneously to toggle between the desktop and your open applications.
5. Winkey + H to Activate Voice to Text
Activating voice to text in Windows 11 allows you to dictate text instead of typing, making it a convenient feature for hands-free operation. Here’s how you can use this feature:
- Open a Document or Text Field
- Ensure you have a document or text field open where you want the voice-to-text function to transcribe your speech. This could be a Word document, an email, or any text editor.
- Press Winkey + H
- Press the Windows key and the letter H simultaneously. This shortcut activates the voice-to-text feature.
- Start Speaking
- Once activated, you’ll see a microphone icon appear on your screen. Start speaking clearly, and Windows will begin to transcribe your speech into the open document or text field.
- Pause and Resume
- You can pause the dictation by clicking on the microphone icon. To resume, simply click the microphone icon again or press Winkey + H.

6. Winkey + V to Open the Clipboard History
The Clipboard History feature in Windows 11 allows you to access previously copied items, making it easier to paste multiple items without repeatedly switching between applications. Here’s how to enable and use the Clipboard History:
- Enable Clipboard History in Settings
- Press Winkey + I to open the Settings app.
- Go to System.
- Click on Clipboard.
- Toggle on the switch for Clipboard history.
- Copy Multiple Items
- You can copy multiple pieces of text or images as you work. Each item will be saved to the clipboard history.
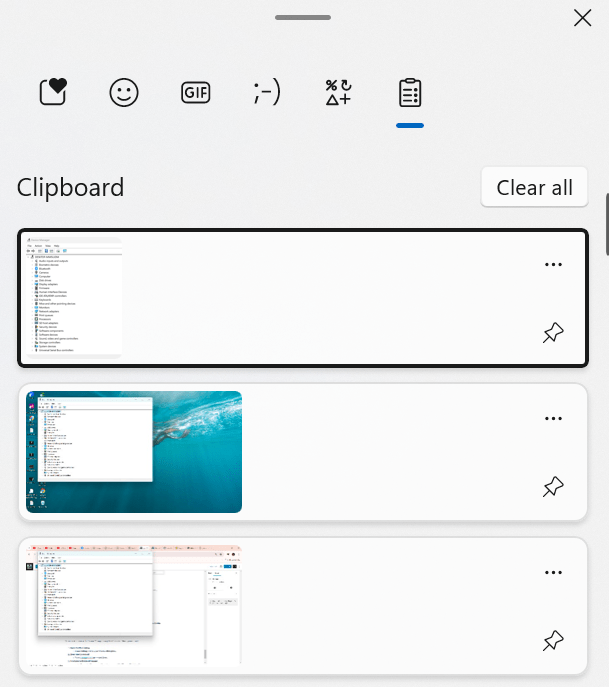
- Open the Clipboard History
- Press Winkey + V to open the Clipboard History.
- A small window will appear, displaying a list of the items you’ve copied recently.
- Select Items to Paste
- Click on the item you want to paste from the Clipboard History. It will be pasted into the active text field or document.
7. Access Settings in 3 Ways
Windows 11 offers several ways to access the Settings menu, each providing quick and easy access to customize and manage your system. Here are three effective methods:
- Winkey + I
- Press Winkey + I simultaneously to open the Settings app directly. This method is the quickest way to access the full Settings menu.
- Winkey + X
- Press Winkey + X to open the Power User menu.
- From the menu, select Settings. This method provides additional quick access to other administrative tools.
- Winkey + S
- Press Winkey + S to open the search bar.
- Type “Settings” and press Enter. This method is useful if you want to search for specific settings directly.
Different Menus in the Settings App
- System
- Access system settings like display, sound, notifications, and power.
- Devices
- Manage Bluetooth, printers, mouse, and other connected devices.
- Network & Internet
- Configure Wi-Fi, Ethernet, VPN, and network settings.
- Personalization
- Customize the look and feel of your Windows experience, including themes, lock screen, and colors.
- Apps
- Manage installed apps, default apps, and optional features.
- Accounts
- Manage user accounts, sign-in options, and family & other users.
- Time & Language
- Set the date, time, region, and language preferences.
- Gaming
- Access game-related settings, including Xbox Game Bar and Game Mode.
- Accessibility
- Customize accessibility features for a more inclusive experience.
- Privacy & Security
- Manage privacy settings, Windows security, and app permissions.
- Update & Security
- Access Windows Update, recovery options, and backup settings.
By using these different methods and understanding the various menus, you can efficiently navigate and customize your Windows 11 settings to suit your preferences and need.
8. Enable the Desktop Shortcut Button
The desktop shortcut button, a feature introduced in Windows Vista, allows quick access to the desktop by minimizing all open windows. Here’s how to enable it in Windows 11:
- Right-click on the taskbar and select “Taskbar settings.”
- In the Taskbar settings window, click on “Taskbar behaviors.”
- Scroll down to the “Taskbar behaviors” section.
- Check the box for “Select the far corner of the taskbar to show the desktop.”
Enabling this feature provides a convenient way to quickly view your desktop, making it easier to access your icons and files without manually minimizing each window.
9. Enable Multiple Desktops
Using multiple desktops in Windows 11 can significantly enhance your productivity by allowing you to organize your workspaces more efficiently. Here’s how to enable and use this feature:
- Enable Multiple Desktops in Settings
- Press Winkey + I to open the Settings app.
- Go to System > Multitasking.
- Ensure the toggle for Virtual desktops is turned on.
- Create and Switch Between Desktops
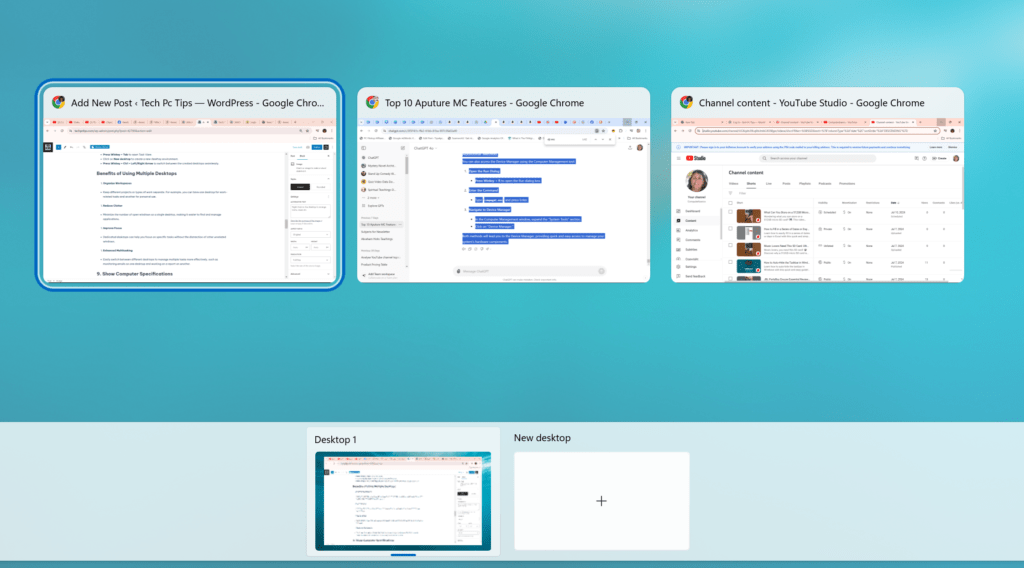
- Press Winkey + Tab to open Task View.
- Click on New desktop to create a new desktop environment.
- Press Winkey + Ctrl + Left/Right Arrow to switch between the created desktops seamlessly.
Benefits of Using Multiple Desktops
- Organize Workspaces
- Keep different projects or types of work separate. For example, you can have one desktop for work-related tasks and another for personal use.
- Reduce Clutter
- Minimize the number of open windows on a single desktop, making it easier to find and manage applications.
- Improve Focus
- Dedicated desktops can help you focus on specific tasks without the distraction of other unrelated windows.
- Enhanced Multitasking
- Easily switch between different desktops to manage multiple tasks more effectively, such as monitoring emails on one desktop and working on a report on another.
10. Show Computer Specifications
Knowing your computer specifications can be useful for troubleshooting, upgrades, or simply understanding your system’s capabilities. Here are several ways to view your computer specifications in Windows 11:
- System Information via Settings
- Press Winkey + I to open the Settings app.
- Go to System > About.
- Under “Device specifications,” you’ll find details such as your processor, RAM, and system type.
- System Information Tool
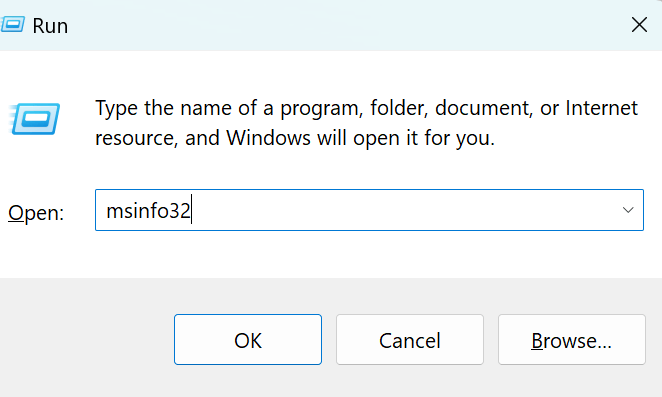
- Press Winkey + R to open the Run dialog box.
- Type
msinfo32and press Enter. - The System Information window will open, displaying detailed information about your system components, hardware resources, and software environment.
- Task Manager
- Press Ctrl + Shift + Esc to open Task Manager.
- Go to the Performance tab.
- Here you can see real-time statistics on your CPU, memory, disk, and network usage along with some system specs like processor name, memory size, and more.
- Command Prompt
- Press Winkey + X and select Windows Terminal (or Command Prompt).
- Type
systeminfoand press Shift CTRL + ENTER to open as admin. - This command will provide a comprehensive list of system specifications, including the OS version, BIOS version, installed updates, and more.
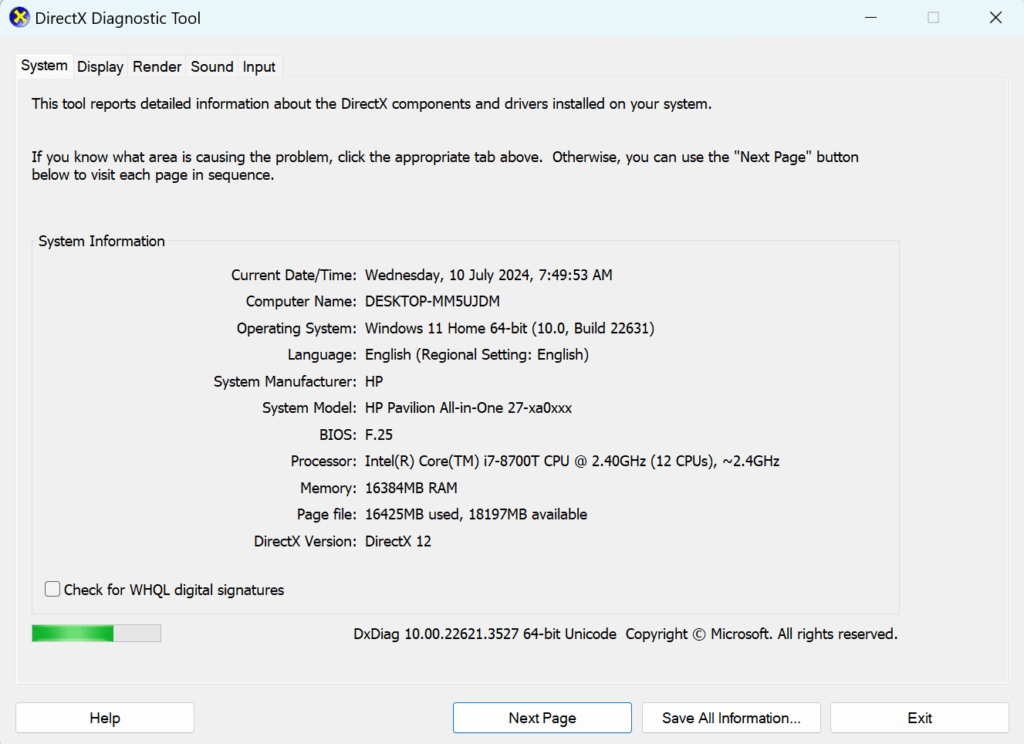
- DirectX Diagnostic Tool
- Press Winkey + R to open the Run dialog box.
- Type
dxdiagand press Enter. - The DirectX Diagnostic Tool will open, showing details about your system, display, sound, and input devices.
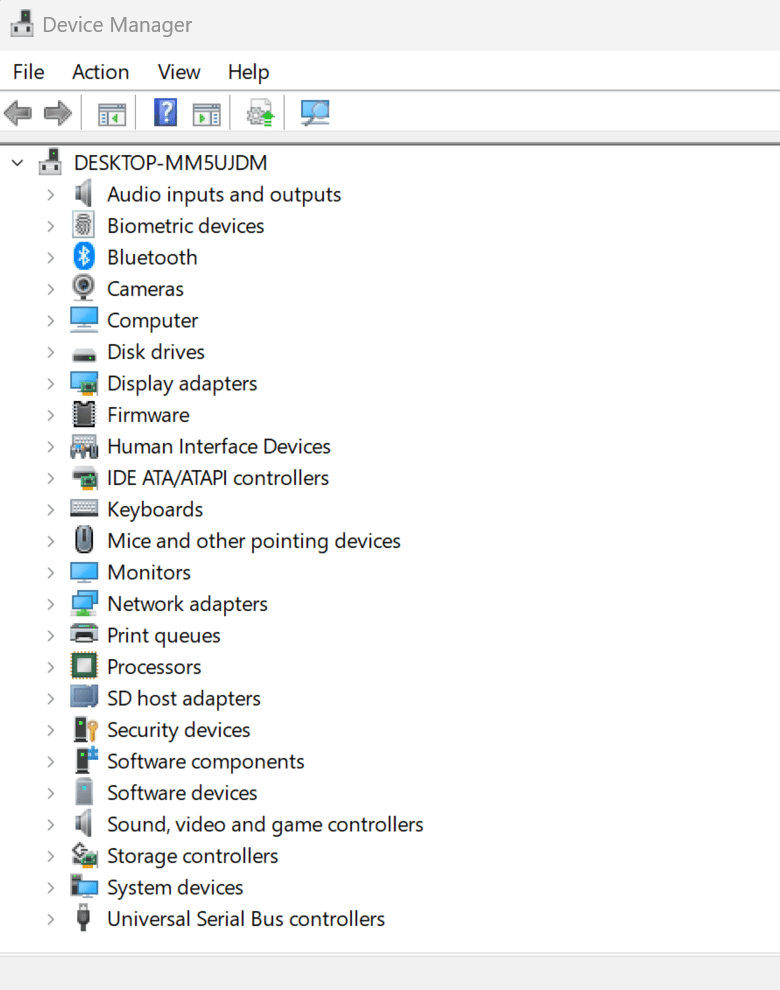
- Device Manager
- Press Winkey + X and select Device Manager.
- This tool provides detailed information about each piece of hardware installed on your system, including drivers and device status.
To access the Device Manager through the Run dialog, follow these steps:
- Open the Run Dialog
- Press Winkey + R to open the Run dialog box.
- Enter the Command
- Type
devmgmt.mscand press Enter.
- Type
This will open the Device Manager directly, allowing you to view and manage your computer’s hardware devices.
Additional Method
You can also access the Device Manager using the Computer Management tool:
- Open the Run Dialog
- Press Winkey + R to open the Run dialog box.
- Enter the Command
- Type
compmgmt.mscand press Enter.
- Type
- Navigate to Device Manager
- In the Computer Management window, expand the “System Tools” section.
- Click on “Device Manager.”
Both methods will lead you to the Device Manager, providing quick and easy access to manage your system’s hardware components.
By using these various methods, you can quickly and easily access a comprehensive overview of your computer’s specifications in Windows 11, helping you to better understand and manage your system.

