As someone who has been fixing computers for years, I’ve encountered countless scenarios where a corrupted Master Boot Record (MBR) has caused boot issues on a disk drive. The MBR is a critical component of your system’s boot process, and when it gets damaged, your computer might fail to start, showing errors like “Operating System not found” or “No bootable device.” Understanding how to fix the MBR can save you from a lot of frustration and potentially costly repairs.
Over the years, I’ve developed a straightforward approach to repairing the MBR that involves using built-in tools provided by Windows. Whether you’re dealing with a traditional HDD or a newer SSD, the principles remain the same. This guide will walk you through the steps to diagnose and repair a damaged MBR, ensuring your system can boot correctly and you can get back to using your computer without further issues. Let’s dive into the practical steps to fix the MBR on your disk drive.
Also see how to repair mbr of an external hard drive.
Does an SSD Have an MBR?
Yes, Solid State Drives (SSDs) can have an MBR. The MBR is not dependent on the type of storage device but on how the drive is partitioned. Both SSDs and HDDs can use MBR or the newer GUID Partition Table (GPT).
Steps to Fix the MBR
Step 1: Create a Windows Installation Media
To fix the MBR, you will need a Windows installation media (USB or DVD).
- Download the Windows Media Creation Tool from the Microsoft website.
- Run the Tool and create a bootable USB drive or DVD following the on-screen instructions.
Step 2: Boot from the Installation Media
- Insert the Installation Media: Connect the USB drive or insert the DVD into your computer.
- Restart Your Computer: As your computer starts, enter the BIOS/UEFI setup by pressing the appropriate key (usually F2, F12, Delete, or Esc).
- Change Boot Order: Set your computer to boot from the USB drive or DVD.
- Save Changes and Exit: Save the changes in BIOS/UEFI and exit.
Step 3: Access the Command Prompt
- Boot into Windows Setup: Your computer will boot into the Windows setup screen.
- Choose Language Preferences: Select your language, time, and keyboard preferences, then click “Next.”
- Repair Your Computer: Click on “
Repair your computer” at the bottom left of the screen. - Troubleshoot: Select “
Troubleshoot” from the options. - Command Prompt: Select “
Command Prompt” to open a command prompt window.
Step 4: Fix the MBR –
In the Command Prompt window, you will use the bootrec command to fix the MBR.
- Run Bootrec Commands:
- Fix the MBR: Type the following command and press Enter:
bootrec /fixmbr - Fix the Boot Sector: Type the following command and press Enter:
bootrec /fixboot - Rebuild the BCD (Boot Configuration Data): Type the following command and press Enter:
bootrec /rebuildbcd
- Fix the MBR: Type the following command and press Enter:
- Exit Command Prompt: After running the commands, type
exitand press Enter to close the Command Prompt window.
Step 5: Restart Your Computer
- Remove Installation Media: Take out the USB drive or DVD.
- Restart: Restart your computer by typing
shutdown /r /t 0in the Command Prompt or by using the power options in the Windows setup screen.
Additional Steps if Needed – More MBR repair tools
If the above steps do not resolve the issue, you may need to run additional disk repair commands:
- Check Disk for Errors:
- Reopen the Command Prompt following the same steps as above.
- Type the following command and press Enter:
chkdsk C: /f /r - Replace
C:with the letter of the drive you want to check.
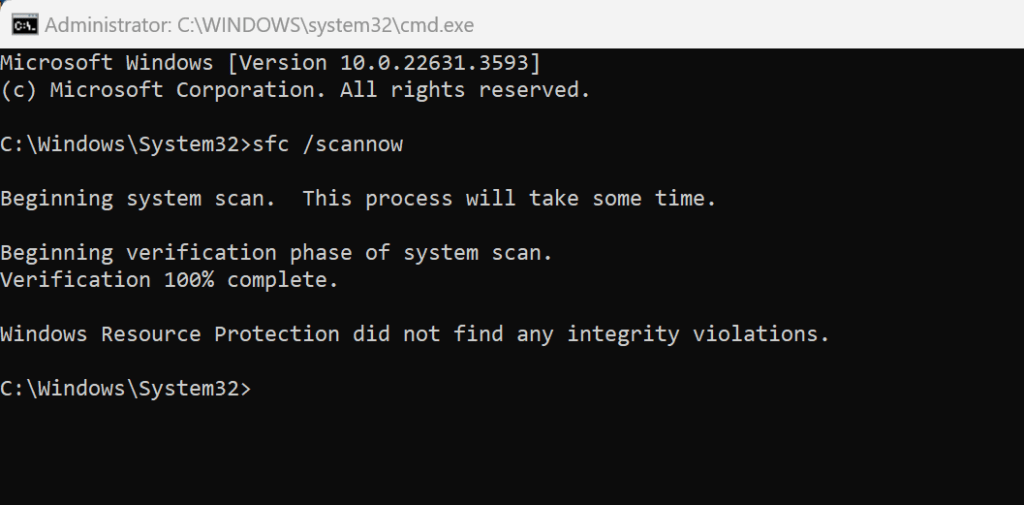
- Use System File Checker:
- In the Command Prompt, type the following command and press Enter:
sfc /scannow
- In the Command Prompt, type the following command and press Enter:

See more about the System File Checker.
How to Fix the MBR with No Internet Connection
If your computer is experiencing boot issues due to a corrupted Master Boot Record (MBR), you can fix it without an internet connection using built-in Windows tools. Here’s a step-by-step guide on how to repair the MBR:
Tools Needed
- Windows installation media (USB/DVD)
- Access to BIOS/UEFI settings
Step-by-Step Instructions
1. Create or Obtain Windows Installation Media
- If you already have a Windows installation DVD or a bootable USB drive, you can skip this step. Otherwise, you will need to create one using another computer. Download the Windows Media Creation Tool from Microsoft’s official site (https://www.microsoft.com/software-download/windows10) and follow the instructions to create a bootable USB drive.
2. Boot from Windows Installation Media
- Insert the Windows installation USB or DVD into your computer.
- Restart your computer and enter the BIOS/UEFI settings (usually by pressing a key like F2, F12, Delete, or Esc during startup).
- Change the boot order to prioritize the USB or DVD drive.
- Save the changes and exit the BIOS/UEFI settings. Your computer should now boot from the installation media.
3. Access the Command Prompt
- When the Windows Setup screen appears, select your language preferences and click “Next.”
- Click “Repair your computer” at the bottom left corner.
- Choose “Troubleshoot” > “Advanced options” > “Command Prompt.”
4. Repair the MBR Using Command Prompt
- In the Command Prompt window, type the following commands one by one, pressing Enter after each:
bootrec /fixmbrbootrec /fixbootbootrec /scanosbootrec /rebuildbcd - bootrec /fixmbr: This command writes a new MBR to the system partition without overwriting the existing partition table.
- bootrec /fixboot: This command writes a new boot sector to the system partition.
- bootrec /scanos: This command scans all disks for installations compatible with Windows that are not currently in the Boot Configuration Data (BCD) store.
- bootrec /rebuildbcd: This command scans all disks for installations compatible with Windows and lets you select the installations you want to add to the BCD store.
5. Restart Your Computer
- After executing the commands, type
exitand press Enter to close the Command Prompt. - Remove the installation media.
- Restart your computer.
Additional Tips
- Check Disk for Errors:
- Sometimes, MBR issues can be related to disk errors. You can run the Check Disk utility from Command Prompt:
chkdsk /f /r - This will scan and fix file system errors and bad sectors.
- Sometimes, MBR issues can be related to disk errors. You can run the Check Disk utility from Command Prompt:
- Restore BIOS/UEFI Settings:
- After fixing the MBR, you might need to reset the boot order to boot from your primary hard drive again.
Using Windows Recovery Options Without Installation Media
1. Access Windows Recovery Environment (WinRE)
- Force Shutdown:
- Turn on your computer.
- As soon as the Windows logo appears, press and hold the power button to force shutdown.
- Repeat this process 2-3 times until you see the “Preparing Automatic Repair” screen.
- Access Advanced Startup Options:
- Allow the automatic repair to fail. You should then see the “Advanced options” button. Click it.
- Alternatively, if you can access the login screen, click the power icon in the bottom right corner, then hold
Shiftand click “Restart.”
- Navigate to Command Prompt:
- Click on “Troubleshoot” > “Advanced options” > “Command Prompt.”
2. Repair the MBR Using Command Prompt
- Run Bootrec Commands:
- In the Command Prompt window, type the following commands one by one, pressing Enter after each:
bootrec /fixmbrbootrec /fixbootbootrec /scanosbootrec /rebuildbcd
- In the Command Prompt window, type the following commands one by one, pressing Enter after each:
- Close Command Prompt:
- Type
exitand press Enter to close the Command Prompt.
- Type
- Restart Your Computer:
- Restart your computer and check if it boots correctly.
Additional Methods
1. Use a System Repair Disc
If you have a system repair disc created earlier, you can use it to access the recovery environment and repair the MBR.
- Insert the System Repair Disc:
- Insert the disc and restart your computer.
- Boot from the Disc:
- Follow the on-screen instructions to boot from the repair disc.
- Access Command Prompt:
- Choose your language preferences and click “
Next.” - Click “
Repair your computer” > “Troubleshoot” > “Command Prompt.”
- Choose your language preferences and click “
- Run Bootrec Commands:
- Use the same
bootreccommands listed above to repair the MBR.
- Use the same
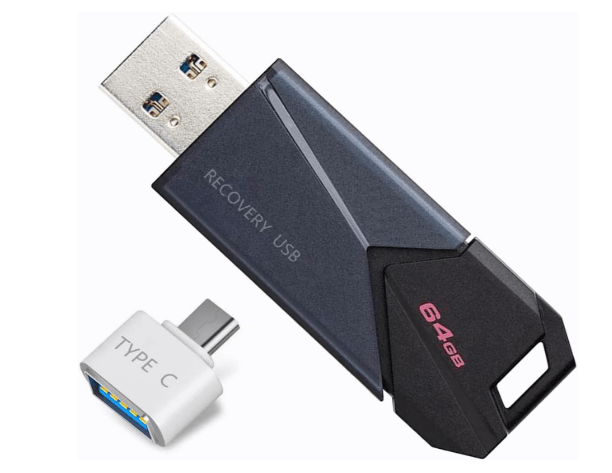
See various boot repair discs and repair USBs on Amazon.
2. Create a Recovery Drive on Another Computer
If you have access to another computer with Windows, you can create a recovery drive to repair your system.
- Create a Recovery Drive:
- Insert a USB drive into the working computer.
- Search for “
Create a recovery drive” in the Start menu and follow the prompts.
- Use the Recovery Drive:
- Insert the recovery drive into the affected computer and restart it.
- Boot from the USB drive by changing the boot order in the BIOS/UEFI settings.
- Access Command Prompt:
- Select your language preferences and click “
Next.” - Click “
Repair your computer” > “Troubleshoot” > “Command Prompt.”
- Select your language preferences and click “
- Run Bootrec Commands:
- Use the
bootreccommands to repair the MBR.
- Use the
Even without installation media, there are several ways to access the necessary tools to repair the Master Boot Record (MBR) on your disk drive. Using the Windows Recovery Environment, a system repair disc, or a recovery drive created on another computer can help you fix boot issues and restore your system’s functionality. It is relatively easy to create a bootable USB repair tool yourself but if you don’t feel confident buy one off Amazon for $20.
Conclusion
By following these steps, you can fix the Master Boot Record on your disk drive and restore your computer’s ability to boot. This guide works for both HDDs and SSDs, as both types of drives can use MBR. If the issue persists, consider consulting a professional or further investigating hardware issues that might be affecting your drive.


