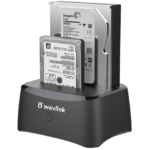
Formatting a hard drive is a process that prepares it for use by an operating system, erasing all existing data and setting up a file system. This guide will walk you through formatting both internal and external hard drives and highlight important considerations.
Important Considerations Before Formatting
- Backup Data:
- Why: Formatting erases all data on the drive.
- How: Copy important files to another drive or cloud storage.
- Determine Drive Type:
- Internal Drives: Installed inside your computer; used for operating system and primary storage.
- External Drives: Connected via USB, Thunderbolt, or another external port; used for additional storage or backups.
- Choose the File System:
- NTFS: Preferred for Windows internal drives.
- exFAT: Compatible with both Windows and macOS; suitable for external drives.
- FAT32: Compatible with older systems and devices but has a 4GB file size limit.
Step-by-Step Guide to Format a Hard Drive
For Windows
- Open Disk Management:
- Press
Windows + Xand select “Disk Management” from the menu.
- Press
- Locate the Drive:
- Identify the drive you want to format. Ensure you select the correct drive to avoid data loss on other drives.
- Initialize the Drive (if needed):
- If the drive is new and uninitialized, right-click on it and select “Initialize Disk.”
- Choose MBR (Master Boot Record) for drives less than 2TB or GPT (GUID Partition Table) for larger drives.
- Format the Drive:
- Right-click on the drive partition you want to format and select “Format.”
- Choose the file system (NTFS, exFAT, FAT32) and allocation unit size (default is usually fine).
- Optionally, give the drive a name (Volume label).
- Check “Perform a quick format” (for faster formatting) or leave it unchecked for a thorough format.
- Click “OK” to start formatting.
- Assign a Drive Letter (if needed):
- If the drive doesn’t automatically appear in File Explorer, right-click on the unallocated space and select “New Simple Volume.”
- Follow the wizard to assign a drive letter and format the drive.
For macOS
- Open Disk Utility:
- Go to
Applications > Utilities > Disk Utility.
- Go to
- Locate the Drive:
- Select the drive you want to format from the left sidebar.
- Erase the Drive:
- Click on the “Erase” button at the top.
- Choose the file system (APFS for modern macOS use, Mac OS Extended for older versions, exFAT for cross-platform compatibility).
- Enter a name for the drive.
- Start Formatting:
- Click “Erase” to begin the formatting process.
What to Watch Out For
- Data Loss:
- Ensure all important data is backed up before formatting, as the process will erase everything on the drive.
- Drive Selection:
- Double-check you have selected the correct drive in Disk Management or Disk Utility to prevent accidental data loss on other drives.
- File System Compatibility:
- Choose the correct file system based on how and where you will use the drive. NTFS is best for Windows internal drives, exFAT is versatile for external drives used across different operating systems.
- Initialization for New Drives:
- New drives must be initialized before they can be formatted. This step is essential to prepare the drive for use.
- External Drives:
- Ensure external drives are securely connected throughout the formatting process to prevent errors.
Further Reading and Resources
- Microsoft Support – How to Format a Hard Drive
- Apple Support – How to Erase and Format a Storage Device in Disk Utility
- Lifewire – How to Format a Hard Drive
By following these detailed steps and taking necessary precautions, you can format your hard drive safely and efficiently, whether it is internal or external.


