Performing a disk cleanup on a computer running Windows is easy and hassle-free. It’s an excellent tool for inexperienced users because it safely deletes files that are no longer needed, without the risk of accidentally removing important data. Disk cleanup can delete unused and temporary files from your hard drive, including files in the Recycle Bin, temporary internet files, downloaded files, and compressed old files.
Why Use Disk Cleanup?
- Free Up Space: Remove unnecessary files to free up disk space.
- Improve Performance: Speed up your computer by deleting temporary and unused files.
- Maintain System Health: Regular cleanup helps keep your system running smoothly and efficiently.
- Safer than Manual Deletion: Automates the process, reducing the risk of deleting critical system files.
How to Perform Disk Cleanup in Different Versions of Windows
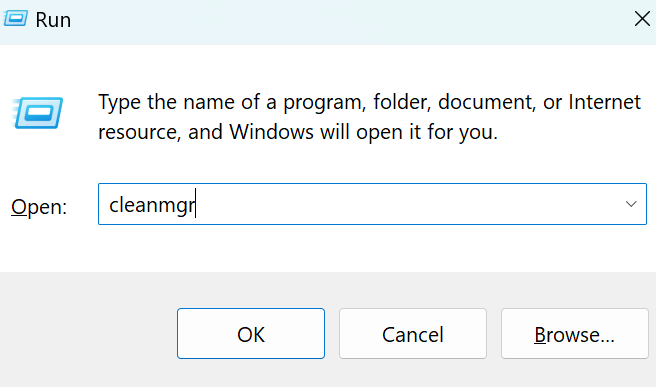
See how to run disk clean-up from the run command box.
Windows XP
- Accessing Disk Cleanup:
- Go to the Start Menu in the bottom left corner.
- Select All Programs, then Accessories, and then System Tools.
- Click on Disk Cleanup.
- Selecting the Drive:
- A window will prompt you to select a drive. Usually, it starts with
C:(the main drive). - Click OK after selecting the drive.
- A window will prompt you to select a drive. Usually, it starts with
- Disk Cleanup Options:
- The Disk Cleanup window will show you options for the selected drive.
- Tick the boxes next to the files you want to delete, such as temporary files or Recycle Bin files.
- Click OK to start the process.
- Additional Options:
- Switch to the More Options tab for additional cleanup tasks like removing system restore points.
Windows Vista and Windows 7
- Accessing Disk Cleanup:
- Click on the Start Menu.
- Go to Control Panel and select System and Security (Vista) or System and Maintenance (Windows 7).
- Click on Disk Cleanup under Administrative Tools.
- Selecting the Drive:
- Select the drive you want to clean (usually
C:). - Click OK to proceed.
- Select the drive you want to clean (usually
- Disk Cleanup Options:
- The Disk Cleanup window will display options. Tick the boxes next to the files you want to remove.
- Click OK to initiate the cleanup.
- Additional Options:
- Use the More Options tab to access additional cleanup features.
Windows 8 and Windows 10
- Accessing Disk Cleanup:
- Press
Win + Xand select Control Panel. - Go to Administrative Tools and click Disk Cleanup.
- Press
- Selecting the Drive:
- Choose the drive to clean up (typically
C:). - Click OK.
- Choose the drive to clean up (typically
- Disk Cleanup Options:
- In the Disk Cleanup window, select the types of files to delete by ticking the corresponding boxes.
- Click OK to begin the cleanup.
- Additional Options:
- The More Options tab offers additional cleanup settings.
Windows 11
- Accessing Disk Cleanup:
- Click on the Start Menu and type “Disk Cleanup”.
- Select Disk Cleanup from the search results.
- Selecting the Drive:
- Choose the drive to clean up (usually
C:). - Click OK.
- Choose the drive to clean up (usually
- Disk Cleanup Options:
- The Disk Cleanup window will appear. Tick the boxes next to the files you want to delete.
- Click OK to start the process.
- Additional Options:
- Navigate to the More Options tab for further cleanup options.
Notes and Tips
- Use Disk Cleanup Regularly: Regular use helps maintain optimal system performance.
- Before Other Maintenance: Run Disk Cleanup before defragmenting your hard drive to avoid moving unnecessary files.
- Be Cautious: Only delete files you are sure you no longer need.
Conclusion
Disk Cleanup is a vital tool for maintaining your computer’s health and performance. Whether you are using Windows XP or the latest Windows 11, the steps are straightforward and can help you free up space, speed up your computer, and ensure it runs smoothly.


